Hand Sculpting with your Fingers and a Toothpick
By Finola Prescott
Skill Level: Beginner
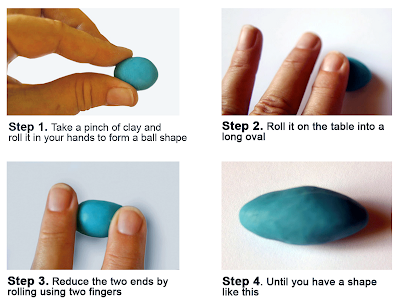
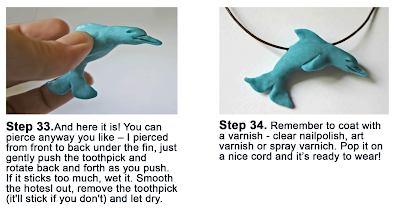
Living in the Caribbean small islands means you often can't get quite what you want to work with, so I try to come up with ways to do things with alternate tools and materials. In this tutorial we'll make a clay dolphin (about 2"x1.5") using just our fingers and a toothpick.
This method works well for a any kind of clay – polymer, ceramic, air dry or cold porcelain; for this tutorial, we use cold porcelain which I like for various things; it's ability to dry very hard without needing any cooking, it takes colour easily mixed into the clay as well as painted on after and that it dries rock hard even when very thin. But it's not without some limitations; what I've found are first that it takes detail reluctantly – you often have to go back as it is drying and redefine details as it tends to bounce back from where you put it into a nice rounded pillow-like shape; that's all well and good if you want a pillow, if you want a knife edge, persist at persuading it and it will eventually agree to do what you want. Secondly, although I'm always fascinated at how hard this air-dries, it does need some kind of varnish applied if it is to be used as jewelry, keyrings or anything that will get damp and last that it doesn't marble colours like some other clays.
I think once you have tried this, you'll realize how much can be done with very little in the way of tools, and there's some inspiration for more finger and toothpick adventures at the end.
Here's the dolphin with some other finger and toothpick creations I've made.
The Mermaid, Fish in the Sea and the Little Fan Fish are polymer clay,
the Flower necklace and Vessel are cold porcelain
All rights reserved. This tutorial is free for personal use,
it may not be used or reproduced for any commercial purposes or altered without seeking and receiving prior permission from the author.
If you liked this post why don't you share it - use the button below


 ShareThis


6 comments:
Very good little sculpture. Good directions
I should try it in metal clay over an armature to keep down the weight.
Alcina.
Hi Finola...
I think you are doing a fantastic job with your blog.
Keep up the great work!
This sculpture tutorial is wonderful. There aren't many step by step tutorials on sculpture online so this is a welcome treat....
Looking forward to seeing more...
All the best with your blog!
thank you both for your kind comments - it really makes a difference hearing from you!
And if anyone has suggestions for tutorials, please do let me know - once I can do it, I'll do my best to put it up here
BEAUTIFUL work, Finola!!! You are really talented. And thanks so much for the abundance of pictures. They really do help the understanding of tricky parts.
I am so blessed to have you as a friend, Finola! Keep up the good work.
Hugs,
Cyn [http://groups.yahoo.com/group/CraftClass]
thanks Cynthia - great to see you here - and kudos back to you at CraftClass yahoo groups - your work there is non-stop good stuff! I'm so glad we finally 'met' on facebook too
Beautiful work Finola. You are very talented
Post a Comment